
The following tutorial walks through the steps to a multi package purchase system in TapMango. It can be used when you would like your customer to purchase multiple products or services in advance. Rather than recording this information on pen and paper, TapMango enables your cashier to select 1 product, which will automatically load their account with vouchers of that product.
To set this up, follow the steps below. Once you have completed this setup, check out our brief tutorial that shows how easy it is for your cashiers to tell TapMango when a customer purchases a product.
Section 1 - Creating Your Product
In order for your customers to receive their package of vouchers, we must first create a product that your cashier would select when your customer makes a purchase.
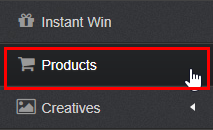
Step 1: Select the products button
Step 2: Click on Create New Product

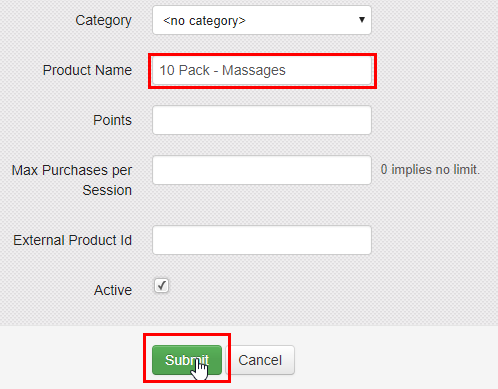
Step 3: Create your product
Section 2 - Creating Your Voucher
Now that TapMango has a product for your customer to buy, we must create a voucher that will be given to your customer automatically after the purchase the product you created in section 1. You will create 1 voucher now, and in section 3, decide how many vouchers your customer will receive.
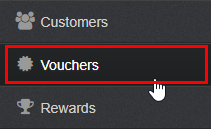
Step 4: Click on vouchers
Step 5: Click on Create New
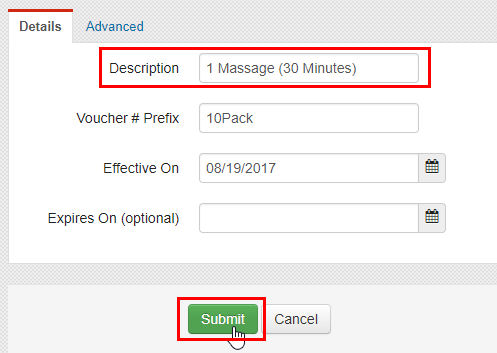
Step 6: Create the voucher your customer will receive
Section 3 - Creating Your Automated Campaign Settings
Now that we have the product that your customer will purchase, as well as the voucher that your customer will receive after making their purchase, we need to create the campaign rules to automatically assign the vouchers to your customer, when they purchase the product from section 1.
Step 7: Go into your campaign manager

Step 8: If you already have a products campaign, go to step 10, otherwise, click on 'create new' to create a new campaign folder.
Step 9: Create your new campaign folder
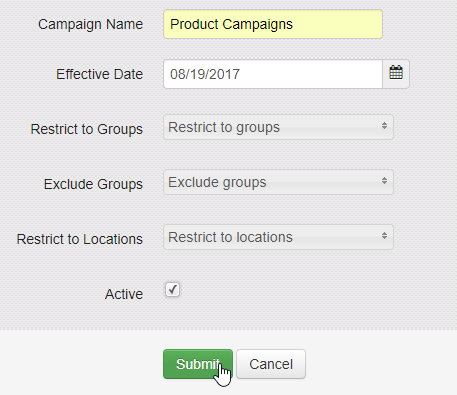
Step 10: Select your Campaign Folder

Step 11: Create a new Activity/Trigger

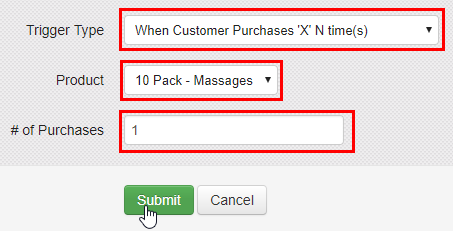
Step 12: Select the 'When customer purchases X N times' trigger, select the product you created in section 1, and enter 1 as the # of purchases required.
Step 13: Click on Add Action

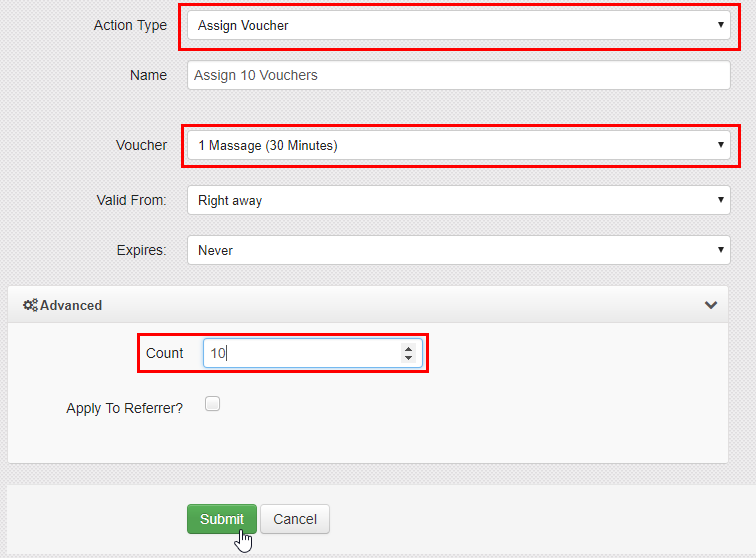
Step 14: Select the 'Assign Voucher' action, select the voucher you created in section 2, and enter in the number of vouchers that you want your customer to receive in the advanced option.
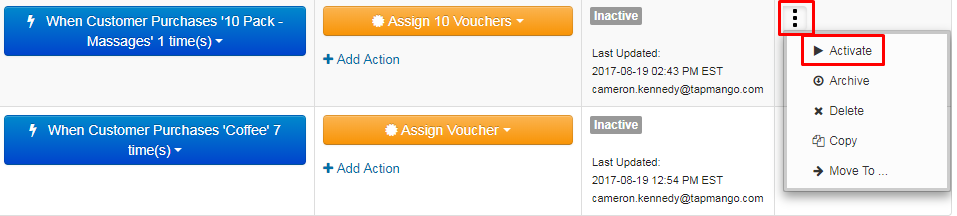
Step 15: Activate your campaign
Comments
0 comments
Article is closed for comments.